Sunday, October 30, 2011

Sewing circles

I've been very very quiet on the sewing front the last few weeks.  All kinds of stuff took over and I totally lost my mojo.
I have been doing bits and pieces but nothing worth blogging about. A few more diamonds sewn to the starflowers and cutting some pieces for the Material Obsession BOM.


I finally sewed all the pieces together for the centre of the BOM block below. I'm months behind now.

After having a couple of free hours this week and yesterday. I made the outer ring for Block 1. 


I was pretty darn pleased with myself.

Until I put it next to the centre circle and thought, gee it's a little bit bigger than I thought it would be.  

I soldiered on regardless. 

I should know better than that.

I sewed.............very carefully...............the centre circle to the outside circle, 

OH SHIT

I've made a shower cap!


Blogger's Quilt Festival

Thank you so much to Amy for hosting the quilt festival. Its a wonderful way to meet lots of fabulous talented bloggers, and sometimes leads to newfound friendships.

Today I would like to show you a quilt I made for my daughter.

I bought a fat quarter bundle of Plume by Tula Pink early 2010 after my daughter had said how much she loved the colours and the prints.
It took me ages to decide on a pattern, I finally chose a pattern by Atkinson Designs, Between Friends which called for 14 1/2 inch blocks. I thought this would showcase the larger prints in the range.

P1030023

After looking at all the prints and wanting to make a queen sized quilt I added some Kona and Bella solids to the mix to break it up a bit.


Joining blocks in Plume
The first blocks, I love these colours
I started putting it together in November 2010. It was so big that to work out how I wanted the layout of the blocks, I had to take it over to my parents house as I didn't have a large enough floor space.
P1040027
The quilt top finally finished
It was too big, 87 inches by 87 inches, for me to tackle the quilting so I sent it off to my favourite long arm quilter, Fiona. She did a wonderful job, the all over pattern echoes some of the prints.


The binding and backing is Kona Bright Pink. I also used one of the feather designs in the backing.
A not very good photo of part of the back.

My daughter loves it and I'm really happy I've made something that she loves! 
It's called Paradise because of the Birds of Paradise on the fabric and my blog name!


Saturday, October 29, 2011

Favourite Things Friday

I'm very late to the party this week, but I have a good favourite to share. In actual fact it's two favourites. Both to do with a very special visit from a very special friend.

Ever since "The Visit" I have been keeping a very low profile. Recovery at my age takes time and lots and lots of rest.

The first favourite: not having to go to jail, despite a certain someone trying very hard to lead me astray.  I was able to stay out of trouble and off the radar of any police that happened to be within range during the week.

Second: Not having to have my stomach pumped from drinking too much alcohol, and maybe ingesting way too much chocolate and salt and vinegar chips,  although I may have missed out on some hunky doctors if I had gone to hospital.  Some people just might be a very bad influence, not naming names.

All food groups covered for "The Visit".


Oh, I almost forgot, a final favourite. I didn't kill Shay.  I hid the peanut butter and Nutella so that no one could accidentally contaminate anything. That was a huge relief. I didn't want to be responsible for no more FTF's.


Tuesday, October 18, 2011

Fabric for THE quilt - Plan B

If at first you don't succeed.........................

Is this an improvement?

You might just see a teensy bit of brown there, I'm determined to have some brown in it.

Sunday, October 16, 2011

Seam Ripper Sunday

After weeks of no sewing, today was THE day to get back into it.
I decided to start with the backing for the HST quilt, which needs a name but I think it's destined to be the HST quilt. Or that F^@#!^% quilt.
I had already made one strip with the left over HST's and decided to make two more for the backing.  Three strips of HST's later and some 2 1/2 inch sashing sewn between them, I put it on the floor to bask in the glory of my fabulous sewing. WTF, I had taken six straight strips of fabric and sewn them into a very curved piece that would have probably worked really well on a lampshade. Unfortunately no photos because I was so annoyed, I picked it up straight away and pulled out the seam ripper.
It looks like this now.
Not too bad but that was a total waste of an hour of my time. After that little setback it was time to try something else.

I shouldn't have bothered.

I want to make a quilt for some friends. The colours they like are grey/browns and orange. I used some Design Seed colour swatches as inspiration. I thought this would help because these are really not my go to colours.  This one below was one of the colour swatches I used.
Design Seeds


For the design I decided on another raw edge circle quilt as I really enjoyed making the last one.
I raided my stash and found some fabrics. I wanted to try popping a few batiks in there as I quite like the odd batik in amongst other fabrics. 
These are the background fabrics I chose. I liked the batiks but didn't like many of the other prints. The lighter browns are especially blech, way too light and shouldn't be in there at all. One teeny tiny problem I don't have enough fabric in the good colours to make the quilt and I really don't want to buy any more in these colours. 


Added in lots of oranges and then added the creams to help with more contrast for the foreground. By this stage I was thinking, either I'm a genius and this is going to be so freaking good, or I've totally lost my mind and I'm going to make the world's ugliest quilt. 

Time to make a test block. I could have picked all the nicest fabrics to make the first block to see how nice it could be or I could have picked the worst fabrics to see how bad it could be.  Which did I choose?  A sensible person would have said let's see how nice it could look. 

I'm not sensible. 

I really dislike it.

This was after I had measured to make sure one of the circles was dead centre of the square, sewed it up, took one look at it and pulled out the seam ripper again and promptly pulled it apart. Sorry no photos of my disasters. I really need to be more prepared with my camera to prove that I'm really crap at sewing sometimes a lot of the time. 

I wonder whether they would like a nice pink and aqua quilt instead.

That was my day, my sewing mojo returned but was missing some vital parts, common sense and accuracy.  I'm hoping they will turn up soon.
The only bright part of my day was that I wasn't the only one with a seam ripper as a constant companion.  Shay and I complained all day by email about our disastrous sewing attempts! It was nice to be able to swear (a lot) and know that Shay knew exactly how I felt.  I think we may have broken our own unofficial swear count today. We may have also invented some extra words too. It's amazing what spell checker will let through! Auto correct is not my best friend either, at one point, apparently I called her something very rude and very politically incorrect when I didn't check my email before I sent it. Fortunately, Shay is still talking to me. At least I think she is, hmm, I haven't heard from her in the last couple of hours!


Friday, October 14, 2011

Favourite Things Friday


This is kind of a surprise favourite this week. I went into my local phone shop to sort out my home phone/broadband bundle and walked out with a brand spanking new iPhone 4S, woo hoo, I'm excited.

Not for free, so don't get too excited for me, well you can get excited if you want to because I'm excited, really excited.

I'm a bit of a techno gadget lover. My phone for the last couple of years has been the Android HTC Desire, an ok phone but as all our computers are Macs it won't synchronise with them. PC is a dirty word or should I say dirty letters in this household. I have been waiting to replace my phone with a new iPhone so that I can sync phone, iPad and computers. I thought I'd have to wait for all the hype to die off before I would be able to get my hands on one, but as luck would have it, the store had received a batch of shiny new, right off the ship/plane iPhone 4S that morning and I ran jumped over little old ladies to get my hands on one.
So this week my favourite is my new baby. I haven't named it yet.


It's nice and bright and shiny white. I'm in love!


Wednesday, October 12, 2011

WIP Wednesday

It wasn't a particularly productive week for me, I was hoping to find my mojo, it's still missing, maybe someone else is having fun with it.

Although I finally finished something.


The binding is all done and dusted on the Plume quilt.
Plume Quilt finally finished
This is all I can show you though as I need Bitchypoo to clean her room and take the tons of crap off her bed so that I can put it on there to photograph. I promise a full length photo next week.
The stats:
Plume fat quarters plus Kona and Bella solids
Pattern - Between Friends by Atkinson Designs
Quilt - 87 inches by 87 inches
Backing - Kona Bright Pink and Plume
Binding - Kona Bright Pink
Quilted by Fiona the Quilting Fairy.


Meanwhile I'm very slowly adding to the starflowers. Sorry it's a little crumpled, it's getting quite big now so tends to be folded when I'm not working on it.

Starflower progress.


On the crocheting side of things. I finally posted a tutorial yesterday on how to make a crochet back with button closures for a crochet pillow. Something I had been thinking of doing for a very long time.
Back of granny squares cushion

Worked On This Week
Plume quilt - finished
Starflowers
Crochet tutorial

Waiting Patiently For Me To Show Interest
Mystery Quilt
Material Obsession BOM
Floral Bouquet quilt - borders to be adde
HST project - finish backing
McFlurry - start making the backing
Circle Game BOM
Monochromatic Challenge
Hexagon Cushion

Weeks Statistics
New Projects - 0
Worked On - 3
Ignored - 8
Finished Projects -1
WIP Wednesday at Freshly Pieced

Pop on over to Lee's blog to see lots of creativity this week.


Tuesday, October 11, 2011

Crochet Cushion/Pillow Back Tutorial

A few people have asked me about the cushion/pillow backs on the crochet cushions I've made, so I'll show you how I made it.
Back of my favourite cushion
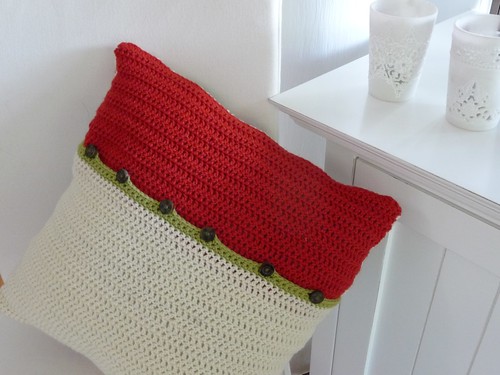
My first cushion back
I originally had the idea after seeing the tutorial from the lovely Lucy at Attic 24 on crochet cushion construction. Lucy uses repurposed woollen jumpers/sweaters to make her cushion backs. It's a fabulous idea, but I live in a place where very few people wear or own woollen sweaters, and after searching high and low through op (thrift) shops and not finding anything, I came up with my own version of a cushion back.

I use 8ply (DK) yarn when I'm crocheting and either a 4mm or 4.5mm hook.
I'm going to assume that you already know how to crochet with basic stitches and understand how to read a pattern. The photos are of a sample swatch I made and a finished cushion I made last year. If I had to make another cushion for this tutorial, I would never have made the tutorial!!!!!!!

The very first thing to do is make a sample swatch. You really really need to do this so that you aren't undoing lots of rows that you've spent time and love making, trust me!

I usually start with roughly 20 chain. This should give you a swatch that's at least three to four inches across. It doesn't have to be exact, just enough to give you an accurate measurement on how many stitches you make to the inch.
Skip 2 chain, treble UK (dc US) across your chain.


Turn and continue by making a treble in each treble for another 5 rows, so that you have 6 rows in total.


Measure the number of stitches you have in an inch. It's good to take several measurements to make sure that you are consistent. You can see below that across a couple of inches, I make 4 stitches to an inch.


Now for the math. You need to work out how many stitches you need to cover the width of your cushion. In this case I have a 16 inch square cushion, so it is 16 inches across. I work 4 stitches to the inch, and I need 16 inches, therefore I need to have 16 x 4 stitches = 64 stitches. Don't fuss too much with it, and it's better to be slightly under than over as the crochet will stretch a little. Make your chain remembering that you need the extra two chain at the beginning before you make your first treble (dc US). So in my case, 66 chain.

If your cushion is a different size and your tension is different so that you have a different number of stitches to the inch you will have to change your calculations, to allow for the differences. If you have problems with working this out, I'm happy to help.


If I was making a 20 inch cushion and my tension is 4 stitches to the inch the math would be 20 x 4 = 80 stitches.


If I worked 3.5 stitches to the inch and I was making a 16 inch cushion the math would be 16 x 3.5 = 56 stitches.


Now start hooking to your hearts content, in my case 64 treble (dc US) each row, you can make it stripey or plain, whatever your heart desires. Keep going until you have a piece that is roughly two thirds the height of the back of the cushion. Cast off.

Now do the same again, the same number of chain and make another piece that is at least a third of the height of the cushion.  When the two pieces are placed together to make in my case a 16 inch square they should overlap by at least two inches. Again, don't stress too much it's just a rough guide, you do need enough overlap so that it doesn't gape when the cushion filler is inserted.


For the edging and buttonholes. Take a contrasting colour and dc (sc US) into each of the treble (dc US) on the top of the larger piece.


Now for some more fun math.  In this case I have 64 stitches and I want to use 6 buttons on this cushion. I need to work out how far apart they need to be so they are evenly spaced.
With 6 buttons there will be 7 spaces like so
______O_____O_____O_____O_____O_____O_____

Now divide the number of spaces into the number of stitches. 64 ÷ 7 = 9.142857  again don't stress. It means that you need to make a buttonhole approx every ninth stitch. There will be an extra stitch, as 9 x 7 = 63 so I would have the extra stitch either at the beginning or the end of the row.


On this cushion I would dc 9, * chain 2, skip a dc (sc), dc (sc) in each of next 8 dc (sc)* repeat to the end of the row.
If you are using bigger buttons you may need to ch 3 instead of 2 in each space.
Sample only where I've only made 1 chain for the button hole but you should get the idea.

Congratulations you are now on the home stretch. I found it easier to sew all the pieces together rather than trying to crochet them together, but if you feel confident, go ahead and crochet them together.  Place the front right side up, now the larger backing piece right side down, and the smaller backing piece on top right side down. Pin the overlapping area securely to make sure that you sew through all three layers. Sew all layers together around the outside.


Turn right side out and mark where the buttons should go. Sew them on and voila, a beautifully finished crochet cushion.


Back of granny squares cushion


P1010941
On this cushion I used 5 buttons. The width of the cushion is 12 inches (48 stitches). 5 buttons means 6 spaces.  48 ÷ 6 = 8 
A button hole every 8th stitch.

Back of my favourite cushion

If you make a cushion back using this tutorial please let me know. I've started a Flickr group so that you can post photos of the cushion backs you've created.
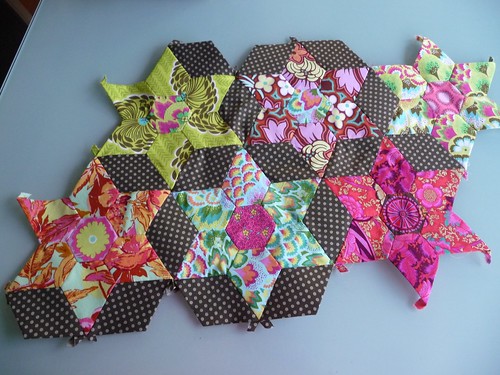
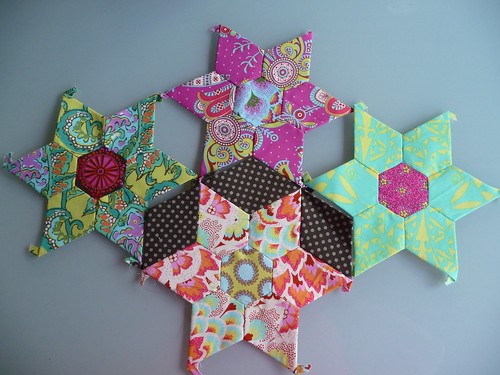
Saturday, October 8, 2011

What's In A Name

I'm jumping in to explain why I chose Sunshine? Paradise? for my blog name. Dawn at As Sweet As Cinnamon has a linky party for What's Your Name And Why. I'm a bit late to the party but better late than never!

When I first started blogging I had no idea what I was doing. I still don't!  A friend had started a blog and I thought I'd have a go. I didn't know what I was going to blog about, I wasn't really doing very much in the way of crafty stuff. I wasn't sure whether I would be posting recipes or just rambling about nothing.  I didn't even think I'd last more than a couple of months.  At the time I started the blog, my part of Queensland was going through months of really awful wet rainy almost cyclonic weather.  I live on the Sunshine Coast and everybody was dubbing it the Wet Coast. I've lived in Australia, New Zealand and Singapore and always said that the Sunshine Coast was paradise, and by far the best location I had ever lived.  After hours of deliberation and no imagination I came up with Sunshine? Paradise? because that was exactly how I had been feeling.
I've contemplated changing my name as most of the time I blog about quilting, but the name is kind of unique and frankly I don't feel like spending hours, days, weeks of trying to think of something else, so it's going to stay as is.

Views from home.


Not far away, it really is paradise here and we do have lots of sunshine, most of the time.


If you'd like to join in pop on over to Dawn's blog and let people know why you chose your blog name.

Friday, October 7, 2011

Favourite Things Friday

It's spring here in Oz and while the northern hemisphere is enjoying beautiful autumn/fall leaves, we are starting to see lots of flowers starting to bloom.
One of my favourite trees is the Jacaranda. I absolutely love the colour of the flowers and they look spectacular against the blue sky. When the flowers start dropping they leave a beautiful purple carpet on the ground. I was in Brisbane today and noticed the Jacarandas are starting to bloom. It's early days yet, another week or two until they are in full bloom.


Not the best photos, hopefully I'll be able to take some better ones in a week or two. Like the one below.

This photo taken from here

Linking up with Shay at Quilting In My Pyjamas.

Wednesday, October 5, 2011

WIP Wednesday

Another week of not much happening. I can't say that Bitchypoo my teenage daughter is not generous, she kindly shared her cold with me, which laid me low for most of the week.

However binding is still continuing on the Plume quilt, 3/4 of the way there. I was hoping to finish it yesterday, but it didn't happen. Next week it WILL happen and I'll finally have something to show!

I've joined in my first ever swap, a nice gentle one. The Scrappy Swap organised by Kat over at Diary of a Flutter Kat. I've been sorting through my stash, which has been lots of fun, messy but fun.

A photo in the spirit of keeping it real. Underneath all that (s)crap is my dining table. Lucky we have a kitchen bench we can sit at, to eat meals.


Working on something to send with the scraps.

Sorry, I can only show you this much so far.  I made a prototype and a second one. The prototype went really well, the second one not so well and I spent a lot of quality time with my seam ripper. It's looking great now.


I'm trying to go back to my original plan of aiming for small goals as the number of WIP's is overwhelming.

Hopefully this is the start of a productive week.

WIP Wednesday at Freshly Pieced

Worked On This Week
Plume quilt - binding
Scrappy Swap

Sitting On The Sidelines
which this week is also 
Waiting Patiently For Me To Show Interest
Mystery Quilt
Material Obsession BOM
Floral Bouquet quilt top - borders to be added
HST project - finish backing
McFlurry - start the backing
Starflowers - English Paper Piecing
Circle Game BOM 
Monochromatic Challenge
Hexagon Cushion


Each week I forget to include something. I think I have them all this week. I'm up to 12 WIP's in total.

Weeks Statistics
New Projects - 1
Worked On - 2
Ignoring - 9
Finished - 0

Click on the WIP Wednesday button above so you can check out much more productive 
people's beautiful work. Thank you Lee for organising WIP Wednesday.