Showing posts with label crochet. Show all posts

Monday, September 30, 2013

And now for something completely different.

When a very very good friend who doesn't crochet, kept on pinning lots and lots and lots of crochet related pins on Pinterest, I had to ask myself, WHY?

Was it because this friend was so excited by my crocheting skills that she really wanted to start crocheting like she said she did three years ago,  when I bought her a how to crochet book, some yarn and some hooks, none of which has been touched since.  Or, was it because she was trying to be subtle, hinting that she would like me to make something for her?

Having heard the swear words after her last attempt at crocheting, I concluded that it was her cunning plan to get me to crochet something for her.

What to make?  After a lot of deliberation I decided on something that would be useful and bright and cheery.

What exactly is it? You ask.


It's a bag.


I followed the tutorial on Attic 24. There are fabulous crochet tutorials by Lucy on her blog, very good for beginners.

(That's a not so subtle hint for my friend!)


Tuesday, October 11, 2011

Crochet Cushion/Pillow Back Tutorial

A few people have asked me about the cushion/pillow backs on the crochet cushions I've made, so I'll show you how I made it.
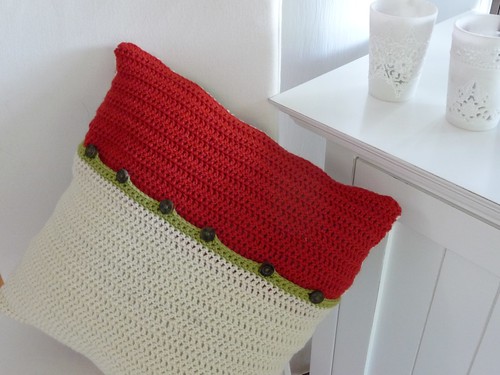
Back of my favourite cushion
My first cushion back
I originally had the idea after seeing the tutorial from the lovely Lucy at Attic 24 on crochet cushion construction. Lucy uses repurposed woollen jumpers/sweaters to make her cushion backs. It's a fabulous idea, but I live in a place where very few people wear or own woollen sweaters, and after searching high and low through op (thrift) shops and not finding anything, I came up with my own version of a cushion back.

I use 8ply (DK) yarn when I'm crocheting and either a 4mm or 4.5mm hook.
I'm going to assume that you already know how to crochet with basic stitches and understand how to read a pattern. The photos are of a sample swatch I made and a finished cushion I made last year. If I had to make another cushion for this tutorial, I would never have made the tutorial!!!!!!!

The very first thing to do is make a sample swatch. You really really need to do this so that you aren't undoing lots of rows that you've spent time and love making, trust me!

I usually start with roughly 20 chain. This should give you a swatch that's at least three to four inches across. It doesn't have to be exact, just enough to give you an accurate measurement on how many stitches you make to the inch.
Skip 2 chain, treble UK (dc US) across your chain.


Turn and continue by making a treble in each treble for another 5 rows, so that you have 6 rows in total.


Measure the number of stitches you have in an inch. It's good to take several measurements to make sure that you are consistent. You can see below that across a couple of inches, I make 4 stitches to an inch.


Now for the math. You need to work out how many stitches you need to cover the width of your cushion. In this case I have a 16 inch square cushion, so it is 16 inches across. I work 4 stitches to the inch, and I need 16 inches, therefore I need to have 16 x 4 stitches = 64 stitches. Don't fuss too much with it, and it's better to be slightly under than over as the crochet will stretch a little. Make your chain remembering that you need the extra two chain at the beginning before you make your first treble (dc US). So in my case, 66 chain.

If your cushion is a different size and your tension is different so that you have a different number of stitches to the inch you will have to change your calculations, to allow for the differences. If you have problems with working this out, I'm happy to help.


If I was making a 20 inch cushion and my tension is 4 stitches to the inch the math would be 20 x 4 = 80 stitches.


If I worked 3.5 stitches to the inch and I was making a 16 inch cushion the math would be 16 x 3.5 = 56 stitches.


Now start hooking to your hearts content, in my case 64 treble (dc US) each row, you can make it stripey or plain, whatever your heart desires. Keep going until you have a piece that is roughly two thirds the height of the back of the cushion. Cast off.

Now do the same again, the same number of chain and make another piece that is at least a third of the height of the cushion.  When the two pieces are placed together to make in my case a 16 inch square they should overlap by at least two inches. Again, don't stress too much it's just a rough guide, you do need enough overlap so that it doesn't gape when the cushion filler is inserted.


For the edging and buttonholes. Take a contrasting colour and dc (sc US) into each of the treble (dc US) on the top of the larger piece.


Now for some more fun math.  In this case I have 64 stitches and I want to use 6 buttons on this cushion. I need to work out how far apart they need to be so they are evenly spaced.
With 6 buttons there will be 7 spaces like so
______O_____O_____O_____O_____O_____O_____

Now divide the number of spaces into the number of stitches. 64 ÷ 7 = 9.142857  again don't stress. It means that you need to make a buttonhole approx every ninth stitch. There will be an extra stitch, as 9 x 7 = 63 so I would have the extra stitch either at the beginning or the end of the row.


On this cushion I would dc 9, * chain 2, skip a dc (sc), dc (sc) in each of next 8 dc (sc)* repeat to the end of the row.
If you are using bigger buttons you may need to ch 3 instead of 2 in each space.
Sample only where I've only made 1 chain for the button hole but you should get the idea.

Congratulations you are now on the home stretch. I found it easier to sew all the pieces together rather than trying to crochet them together, but if you feel confident, go ahead and crochet them together.  Place the front right side up, now the larger backing piece right side down, and the smaller backing piece on top right side down. Pin the overlapping area securely to make sure that you sew through all three layers. Sew all layers together around the outside.


Turn right side out and mark where the buttons should go. Sew them on and voila, a beautifully finished crochet cushion.


Back of granny squares cushion


P1010941
On this cushion I used 5 buttons. The width of the cushion is 12 inches (48 stitches). 5 buttons means 6 spaces.  48 ÷ 6 = 8 
A button hole every 8th stitch.

Back of my favourite cushion

If you make a cushion back using this tutorial please let me know. I've started a Flickr group so that you can post photos of the cushion backs you've created.

Tuesday, June 7, 2011

Lucy

Jenni from Baa-me Kniits has a very cute friend Lucy, who is visiting lots of people in Blogland. First stop was Brisbane to see Kate at dash robin, where she had a lovely time.
Lucy has been staying with me for a couple of weeks now, a little longer than I was intending, as I made a quick trip away and Lucy came with me.

While she was here on the Sunshine Coast she did lots of interesting things.
 Look at the lovely scarf Kate made for Lucy.
We went for a drive to look at the local scenery.


Lucy had a horse and carriage ride at my sister's house.

She phoned home to Jenni.

Lounged by the pool, before going to Melbourne. It wasn't warm enough to go in for a dip.


 We travelled on a tram to the Good Food and Wine Show.

Said hello and had a photo taken.

Sampled some champagne, it was there, we had to!

Went to the Lindt shop and had hot chocolate and macarons.

Now Lucy is going to visit another blogging friend. I've given her something to make sure she has a snack for the journey.


Tuesday, March 29, 2011

Crochet Carrot Pattern

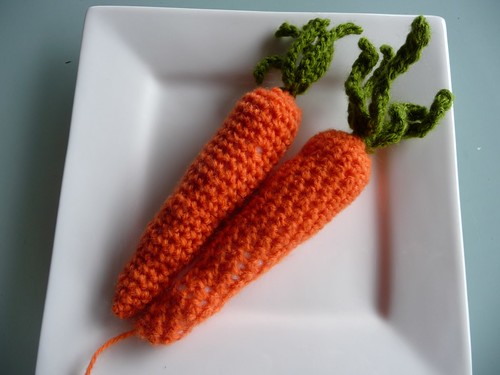
Here's the pattern for the crochet carrot I promised in my post last week.

P1040832


WARNING: Before I start I want to let you know that if you are a novice crocheter I definitely wouldn't try this. It is quite fiddly at the beginning and difficult to see the stitches.  If you do try it I think you'll use not very nice words and call me all sorts of names and never touch crochet again. For anyone who is fairly proficient at crochet it should be relatively easy, I hope. The first few rounds are not easy but after that it's a breeze.
* I am using the English terminology here dc = sc for U.S. readers.*


You will need:

  • orange 8ply (DK) yarn
  • green 8ply (DK) yarn
  • 4.00mm hook
  • fibrefill
  • something to use as a marker, as this is worked in rounds and you need to mark the first stitch of each round. I just use a roughly 6 to 8 inch scrap of yarn that is a different colour to what I'm using to crochet.

CARROT
Using the orange yarn, make 2 chain, making sure you leave a few inches tail of yarn at the beginning.
Round 1. Make 5 dc in the first chain ( the second one from the hook).
Round 2. Place marker and then dc into each of the next 2 stitches, inc in next stitch by making 2dc, then dc into each of the last 2 stitches. (6 stitches)
Round 3. Place marker and remember to do this at the beginning of each round. dc into each dc.
Round 4. same as round 3.
Round 5. dc into each of first 3 stitches then inc in next 2 stitches (by making 2dc in each stitch) then dc in last stitch. (8 stitches)
Round 6. dc into each dc.
Round 7 - 10 repeat round 6.
Round 11. dc into first dc then inc in next stitch, dc into the last 6 stitches. (9 stitches)
Round 12. dc in each dc.
Round 13. dc into first dc, inc in next dc, dc into last 7 stitches. (10 stitches)
Round 14. dc in each dc.
Round 15. dc in each dc.
Round 16. dc in first 8 stitches, inc in next dc, dc in last stitch. (11 stitches)
Round 17. dc in each dc.
Round 18 - 22 dc in each dc.
Round 23. dc in first dc, inc in next two dc, dc in last 8 stitches. (13 stitches)
Round 24. dc in each dc.
Round 25. dc in first dc, inc in next two dc, dc in last 10 stitches. (15 stitches)
Round 26. dc in each dc
Round 27. dc in first dc, inc in next dc, dc in last 13 stitches. (16 stitches)
Round 28- 29. dc in each dc.
Round 30. Decrease by making a dc into every second dc. (8 stitches)
Take the loop off the hook and pull to make it big, so that id doesn't unravel during the next step.
Now fill carrot with fibrefill, do not fill it tight, as the filling will stretch the crochet and you will see it through the stitching. Learn by my mistake!
P1040833
See how the fibrefill is much more obvious.

Now to finish the carrot. Place the loop back on the hook.
Round 31. Decrease by making a dc in every second dc. ( 4 stitches)
Fasten off leaving a long end.


LEAVES
Using the green yarn make 11 chain.
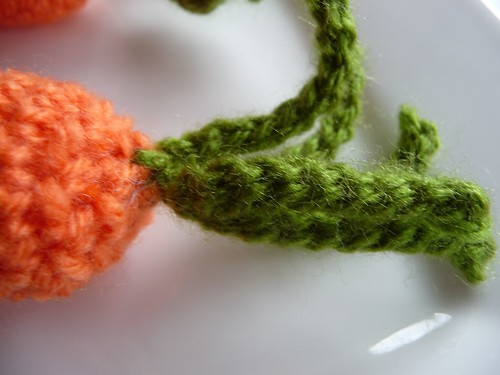
Slip stitch into the second chain from the hook and into every chain back to the beginning. (10 stitches)
Do not cut yarn, make another 11 chain, slip stitch into second chain from hook and in every chain to the beginning. (10 stitches). Repeat this until you have 5 lengths of chain. Tie off leaving a long thread.

Attach the leaves to the carrot, sewing in loose ends.  You can leave the long end of yarn at the thin end of the carrot if you wish.


P1040832
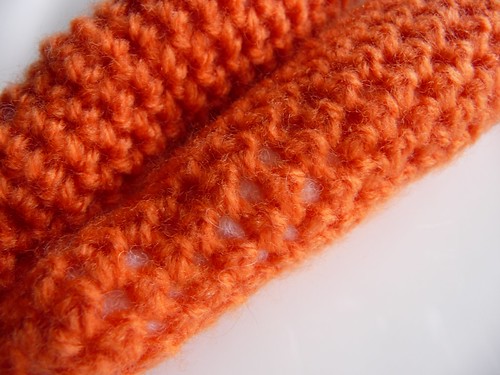
On the carrot on the right, the leaves were made the same way but instead of slip stitching, a dc was made in each of the chain, I think the slip stitch is more delicate.
P1040834
If you have any trouble or you find any mistakes, please let me know.  You can make the carrots bigger or smaller by adjusting how many times you increase and how many rows you decide to do.

Good luck.


Crochet Carrot


Monday, March 21, 2011

One Hot Rabbit

You all know how I've loved George Clooney from afar. Lake Como is just way too far to go to stalk him sit on his doorstep.

Unfortunately even though I've bought a Nespresso coffee machine in the hopes of wooing him, he hasn't shown the slightest bit of interest.

BUT when I saw Kirsty's photo of George I knew that I had been going about it all the wrong way.

I needed a plan.


Thank you very much Kirsty for sending me the photo.

I needed something more than just a Nespresso machine, after all, they are everywhere.


What Chaud Lapin (Hot Rabbit) could resist one of these?


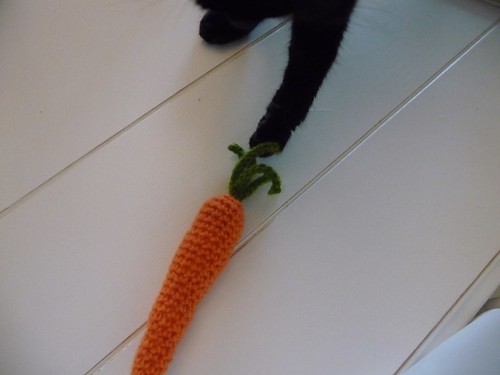
Even the cat couldn't resist, so I think I'm on a winner here.


George Clooney come on down!!!!

P.S. I have a back up plan too, if he's not particularly partial to crochet, I can sew some up too.

Sunday, March 20, 2011

Friday Night Sew In


Fridat night I stayed home instead of going out partying/clubbing, lol.  Pj's were on, ready for my second ever Friday Night Sew In.

I had been sewing all day to finish this quilt top, so even though I got myself organised (pj's on),  by the evening I had run out of steam.

Paris in Summer


I had grand plans to attach the binding on this quilt,
Dad's quilt front

but I hadn't trimmed the quilt to size and I wasn't in the mood to get it out and move everything off my large cutting mat.

Instead I pieced a block for the Monochromatic Challenge.

P1040783


That didn't take long and I was going to join in on the great carrot sew along party, but by then I'd had enough of sewing so I made this instead.

P1040781

The cat seems to like it.

P1040779


Then I cut a few of these for the Lily's Quilts Quilt Along.
Blades for Lily's Quilts QAL

Not quite as productive an evening as I had planned, but at least I've pieced the block ready to embroider, and I started on cutting out the Dresden blades, so not so many to do today. I caught up with google reader and flickr.  Oh and I started on developing a prototype for a crochet carrot. Hopefully I'll be able to post a crochet carrot tutorial soon.

Friday Night Sew In is over at Handmade By Heidi, so check out all the other (and probably far more productive) posts from everyone else.

Wednesday, January 12, 2011

Rain and devastation

Firstly thank you so much for all the emails received from the wonderful people who were concerned, and wanted to make sure we were ok. I also received lots of phone calls from friends to check up on us. It's heart warming to know that we are in the thoughts of so many people. We are fine. It's not even remotely bad here compared to the rest of Queensland.


I started this post on Monday ready for Tuesday Tidbits.  I went to bed on Monday night oblivious to the terrible devastation to lives and property in the Lockyer Valley and Toowoomba west of Brisbane. I woke up yesterday morning  to see the absolutely terrible disaster and horrendous situation these people had to endure. After the initial disbelief of what happened there I spent the rest of the day yesterday quite teary as I have friends whose family live in Toowoomba and then seeing the flooding that happened between here and Brisbane, another place where people I know live, it was all just a bit too much.
Fortunately everyone I know and their friends and family are all safe.


I am sure you have all seen on TV the footage of all the damage. It now means that 75% of the state of Queensland has now been affected by flooding.  To put it into perspective, Queensland is twice the size of Texas, and the state covers a quarter of the Australian land mass. 
Our area is now cut off to the north where the nearest major town, Gympie has been inundated and is suffering from mjor flooding and will be so for the next few days. South of us between Brisbane and here on the Sunshine Coast the roads have been cut. Hopefully in that area the water will drop more quickly and today the roads will be accessible. 
My heart goes out to all the people who will be affected by the flooding in Ipswich and Brisbane over the next few days, there are so many people in this state whose lives have been changed forever by this devastation. The floods in Brisbane will be just as bad as they were in 1974, and possibly worse. We are all hoping that it will only be as bad as 1974. The severe weather system is now affecting northern New South Wales , so there will be major flooding there as well in the next few days.


In my little part of the world, I live on acreage and rely on rainwater for my water supply and I am always acutely aware of the rainfall here. I'm also a bit of a weather geek, ask any of my friends. I have two rain gauges, one electronic and one normal manual one that I check regularly. I can only tell you about how much rain I have had and hopefully it will give you an understanding of why the flooding is so bad in the rest of SE Queensland. Since the 1st of January we have had 774 mm of rain that is 30 inches in just 11 days.  In December we had 675 mm of rain, 26 1/2 inches so in just over 40 days we have had, at my house, 1449 mm or approx. 57 inches of rain. That is only at my house, some places have not had quite so much some have had so much more. If you imagine having that much water pouring on to your land day after day after day, onto earth that is already completely saturated you can begin to understand why this flooding has occurred. It is hopefully a once in a lifetime occurrence, a freak of nature. we have been so very very lucky here, the rain has been an inconvenience, blocking roads, making daily living a little more difficult. The rest of Queensland has been affected in a much greater way.


I found out last night about Toni's blog Make It Perfect. Toni is organising an online auction to raise funds for the  Premier's Flood Relief Appeal. I am not sure whether I will have anything ready to auction by Friday but I will definitely be doing what ever I can to help add to the fund. So if you can add the button to your blog to let as many people know about it. The more people that know, the more money can be raised.


Now on to a lighter note.


Fortunately for me it stopped raining long enough on Monday for the postman to deliver some more of my purchases.  Yes more and there will be more soon! I'm still waiting on most of the yardage I bought before the end of the year. Look one bright piece in amongst MORE soft-hued purchases!
 These were extras for this pattern:


This also arrived in the mail, I have been looking at Emily's work for some time and finally decided to purchase her book.  It has some great quilts and ideas that I would like to try.....eventually.
I'm relatively new to quilting so at the moment I  would rather follow a pattern which I can make my own mark on by changing it a little bit to be more individual. I don't feel I have enough confidence to just go ahead and make something with out some form of pattern to follow. I'm hoping that one day soon I will feel more confident in having a go at designing my own quilts.

During all the rain it would have been a perfect opportunity to do masses of quilting but I was too worried that we were going to slide down the hill, and had to go and clean out gutters, dig trenches etc, to concentrate for more than a few minutes.  

I started on this instead, I'm enjoying the rhythm of crocheting and it was peaceful and calming for short bursts in between the frenetic activity.  This was my second attempt at this, so I haven't got very far, as I am adapting a pattern, thanks to an idea I found on flickr. If it works I will link the flickr photo next time. I don't want to link if it looks like crap when I've finished.

It's another of those things that looks absolutely fabulous in my head but I'm not so sure about at this stage. Part of the problem with this, as although I'm buying out the universe's supply of quilting fabric I don't want to buy any more yarn until I use some of what is in my stash, and I don't quite have the colours I originally wanted to use. These are close, so I'll keep on with it and see how it progresses.

Before the massive amount of rain I finished sewing 100 of these squares together, still need  to finish another 100.

The grand total for Sunday's rain was 273mm which is just a bit under 11 inches. Thanks for all the great suggestions after Sunday's post, I especially loved Rachael's offer to get George Clooney to come and save me. 


Wednesday, December 29, 2010

2010 a pictorial crafty review

Lots A few of my fabric acquisitions during 2010. Looking at these, there are a lot of brights and there is an awful lot there that is still sitting in my fabric stash.

Sewing/quilting projects I have been working on this year, using some of the fabric stash from above. Most of them are finished but there are still WIP's in there and a couple that will probably never be finished.

This years crochet.
I have been playing with Flickr mosaics, it's fun but time consuming. Now I just need to make one of all my finished projects for the year. 

PS I have no idea why the fabric mosaic is bigger than the others, I can't seem to make them all the same size, sigh!